


We Ship Worldwide!


Secure
Shopping Cart by

Excellent eBay feedback!


|
How to: Projector Retrofit
5th Gen Prelude Headlamp Retrofit using 2.5" Valeo (Audi A4) H7 or D2S projectors (Retrofit done by JLUDE - originally posted on PreludePower.com):
Step 1: Removing the headlights
- Remove the honeycomb grill (2 bolts and a couple plastic clips)
- Remove the signals and side markers
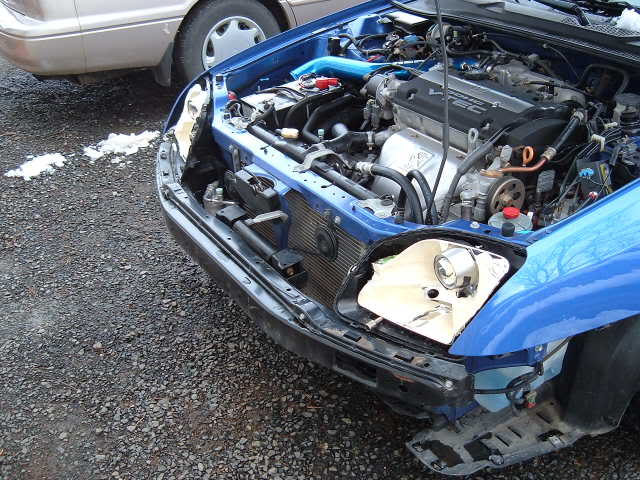
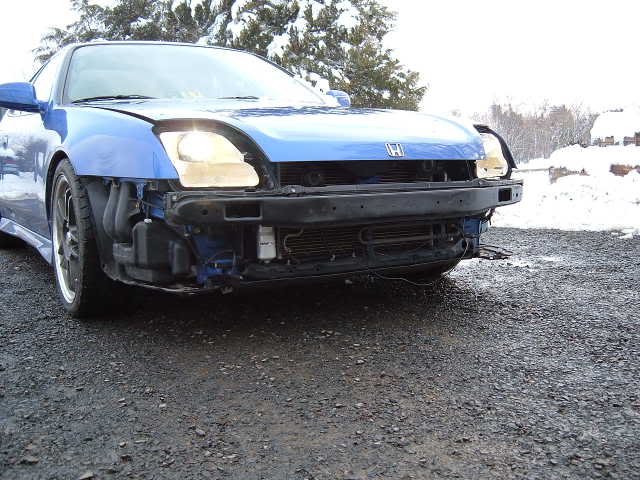
- Raise the front of the car enough to get under it and take the 6 bolts out that hold the bumper cover from underneath (all bolts are 10mm, use a socket ratcheting wrench)
- Remove the two phillips-head bolts (8mm) that hold the bumper cover to the wheel well (you may have to pull the black plastic wheel well cover up some to get to this screw)
- Use two people and slowly work the bumper cover off. There are 2 clips above the side markers that must pop straight out to come off and then it clips under the headlights, pull forward after you get the side clips free and off it comes! Now store it somewhere safe inside!
- Unbolt the headlights! There are 3 stainless bolts:
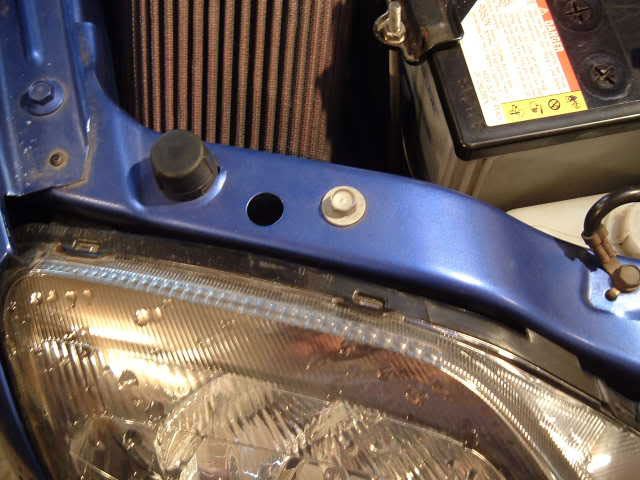
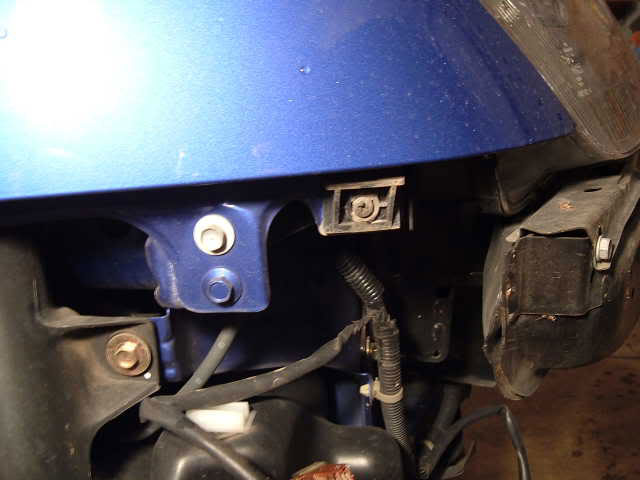
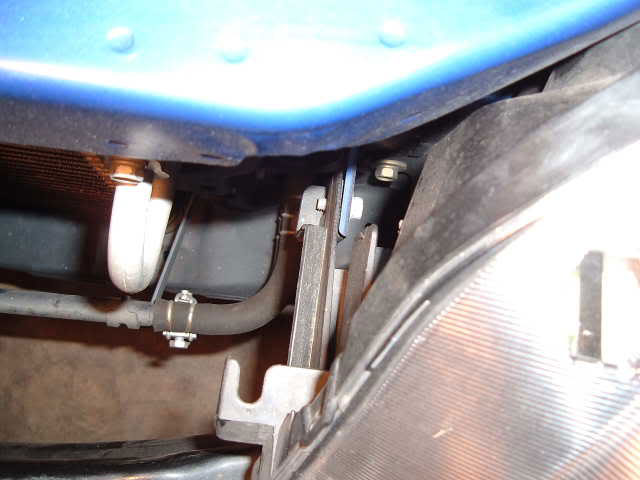
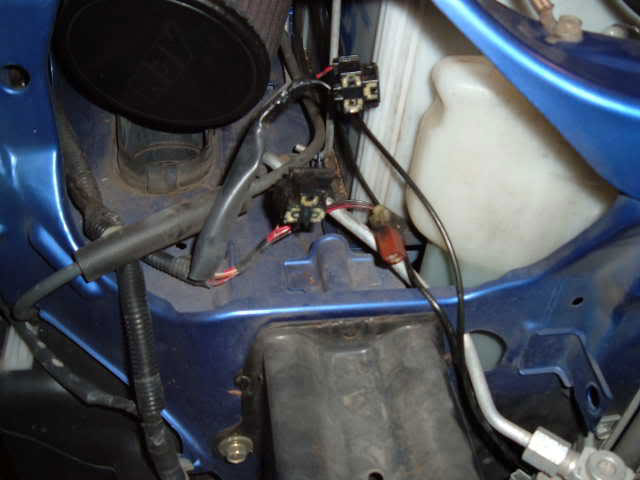
Unplug the headlight harnesses and remove the headlights.
Take your bulbs out FIRST! Use the oven method to remove the headlight lenses: Preheat oven to 200 degrees, then turn it off, put a cotton towel in the oven and set the headlights (one at a time) on the towel. Close oven, leave them in 7-9 minutes. Remove them and then using a flat head screwdriver, pop the clips loose as you pry the lens away from the black housing and the sealant should stretch. Cut the sealant immediately with a sharp knife as it comes apart.
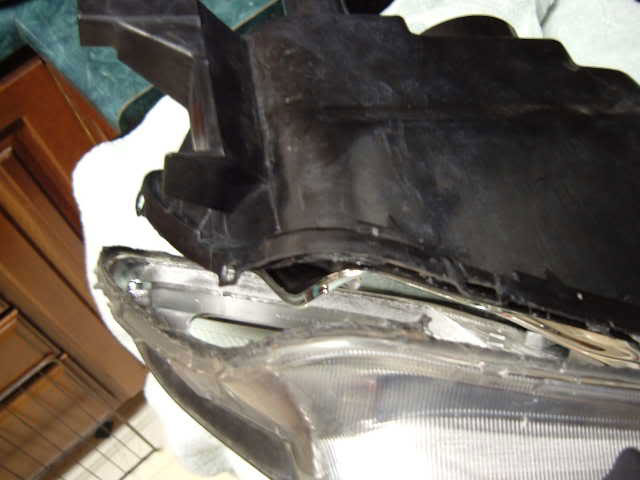
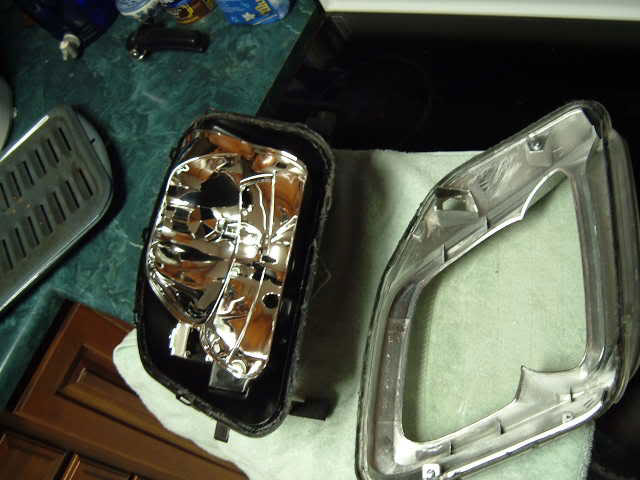
tada!
Loosen (counter clockwise) the adjustment screws in the headlight alternately until the little ball joint has tension on it. Then use a large flat head screwdriver to pry the ball joint out of its socket.
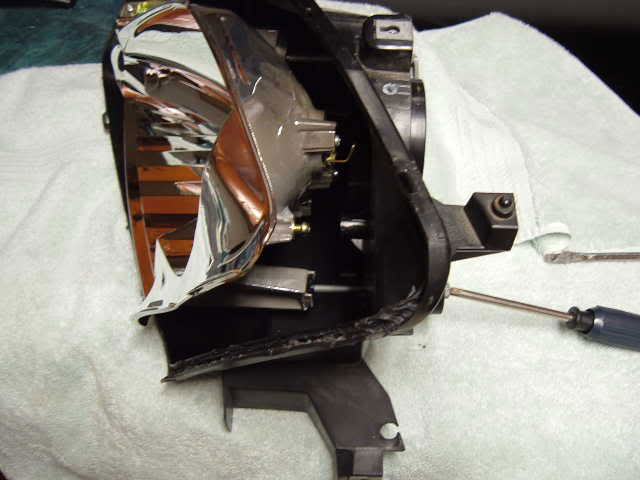
Now comes mounting the projectors (or retrofitting).
Remove the bulb holder wire and screw and remove the single screw that holds the H1 low beam bulb shield and remove the bulb shields.
Use a dremel tool with cutting disk to cut the hole out for the projector: The best idea here is to work slow, cut a small amount first and then start fitting the projector bowl in from the front side and enlarge the hole as needed to center the projector and allow it to seat all the way to the bolt holes on the lens holder. There is not a lot to show here except that you should use the lines on the projector to keep the hole centered and so that both right and left projectors mount in the same position on the reflector. Some pics:
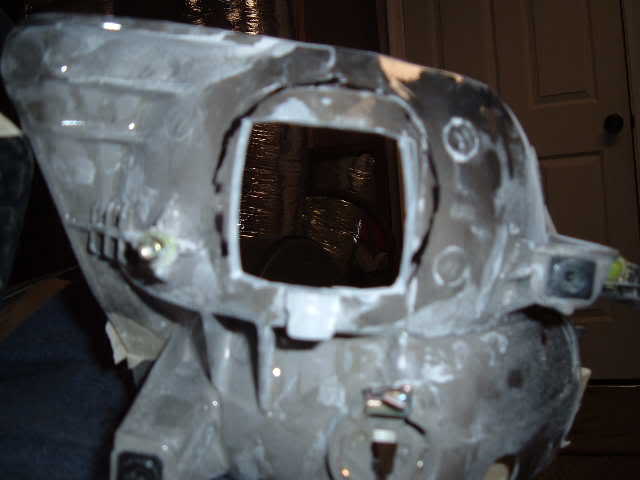
I made the mistake of mask taping the reflector. No scratches but a couple flakes of chrome came off when I removed this tape on the reflectors! Best would be to use plastic cling wrap and tape it with electrical tape on the back side of the reflectors only!

Cut the hole! Take your time and test fit the projector often!
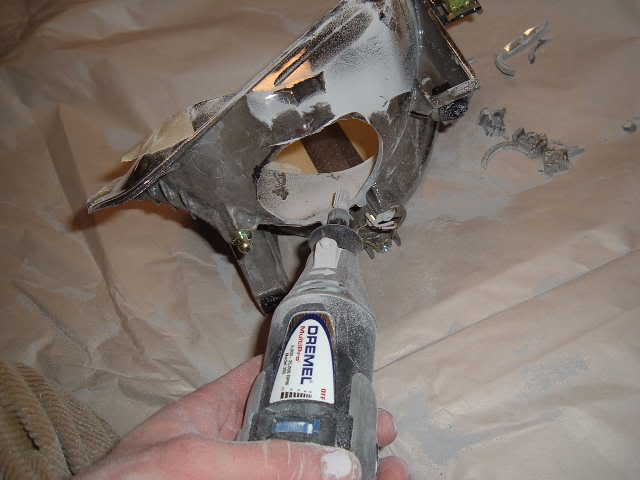
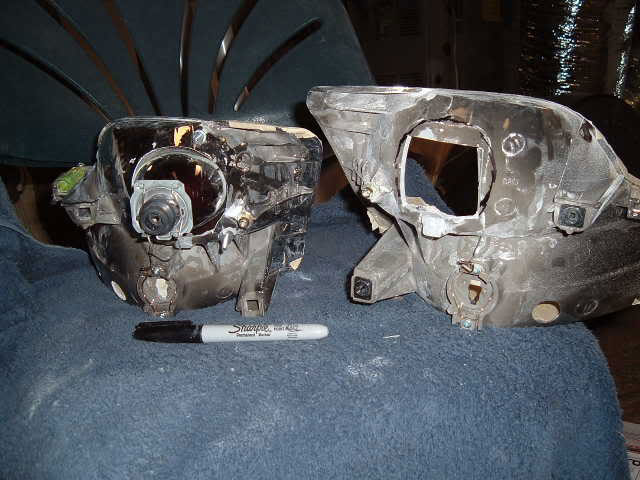
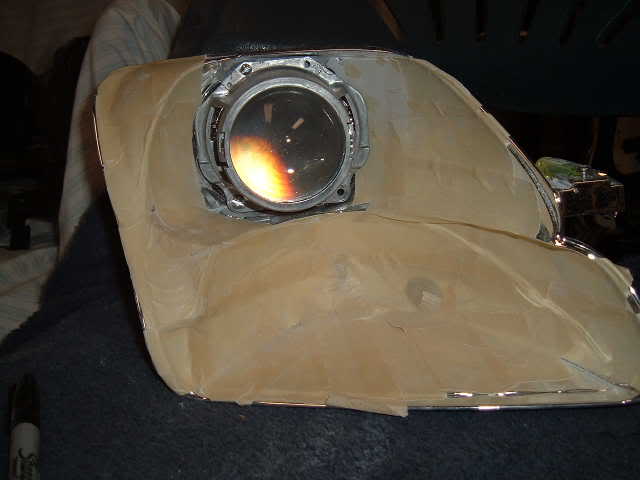
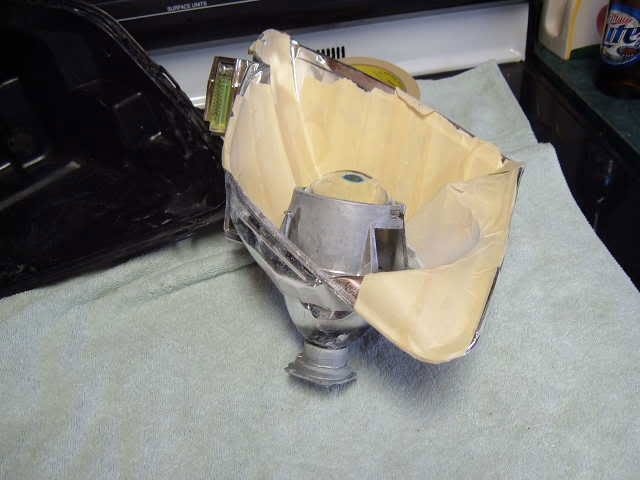
I then used a dremel steel cutting bit to trim the edges of the hole I had cut to smooth them out and hold the projector bowl flush.
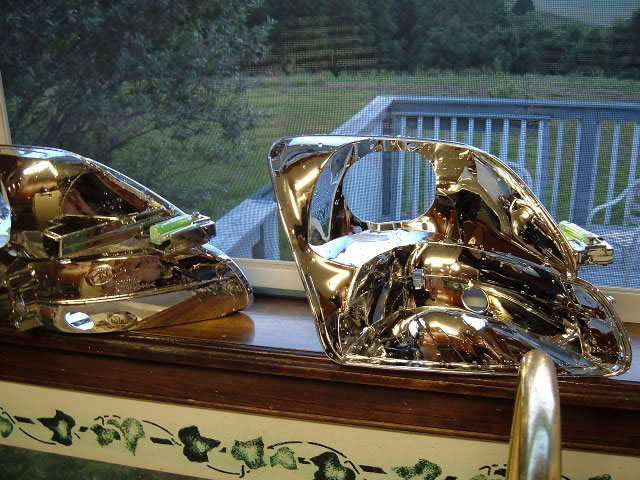
Once the hole was trimmed out enough I centered the projector as best I could and while sitting the flat base of the reflector on a level surface put a small level through the opening in the side of the projector and make sure it sits level, this will mean that the cutoff shield is basically level.
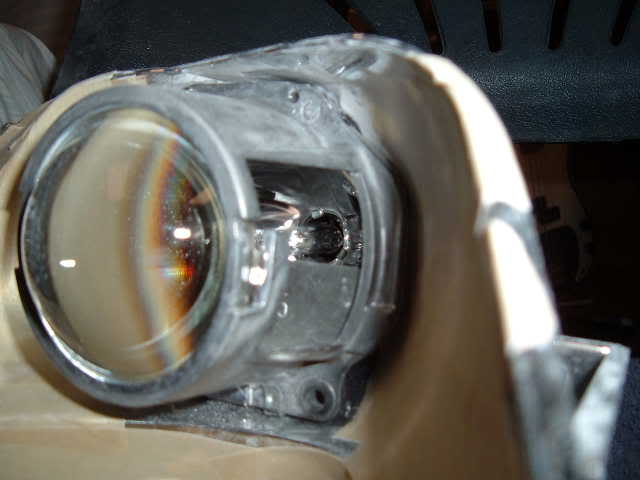
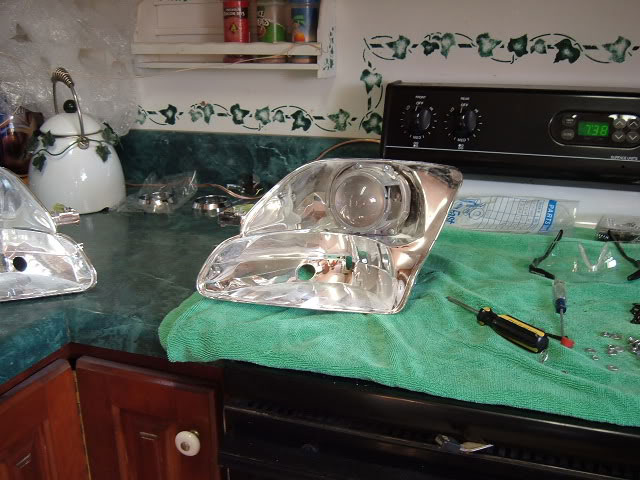
Once you have it in position mark and drill the 4 holes for the machine bolts that will hold the projector to the reflector. This takes some trial and error. I started each hole, then put the projector back in and looked through the bolt hole to see if it was lined up, if it was off slightly I adjusted the hole and then drilled it through the reflector (these holes will need to be slightly larger later). I used the small holes at the top side of the Valeos (as seen in the pics with smaller bolts since these holes are a smaller diameter).
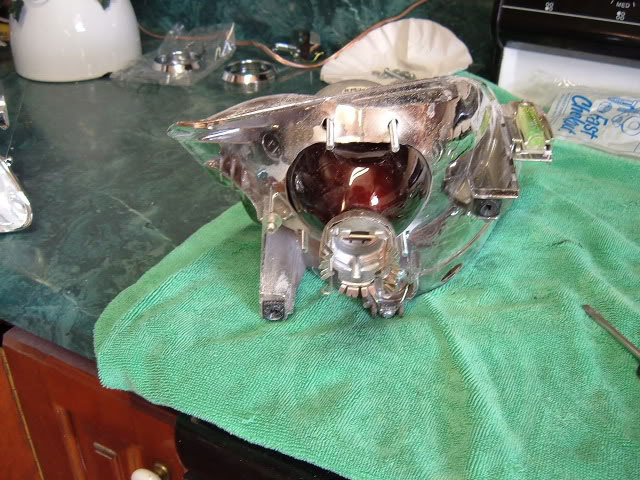
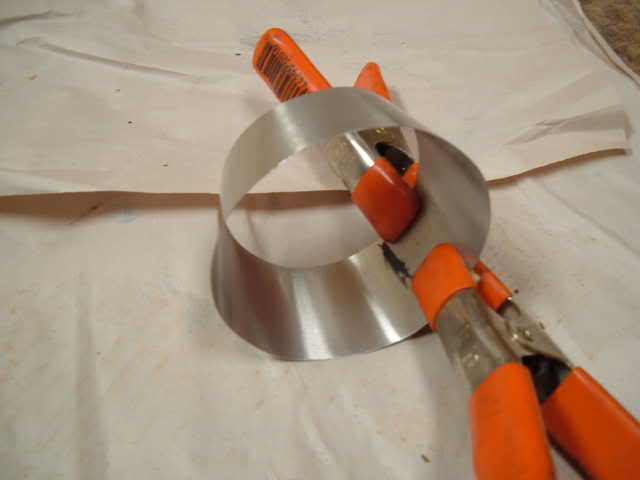
Once you are satisfied with the bolt holes, take the projectors back out of the reflectors and finish your shroud and bezel. I used polished aluminum sheeting for my shroud, made a template from construction paper and then cut the aluminum, trimmed it to fit perfect:
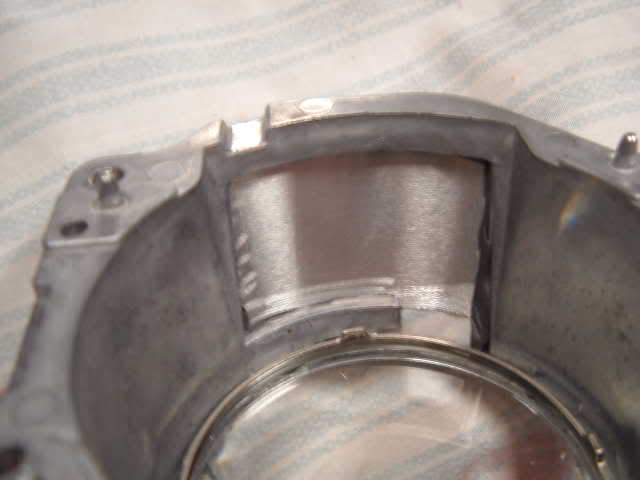
Before I put the shroud on the projector I covered the two openings on the sides of the Valeo lens holder with pieces of aluminum and JB welded them on to block the light leakage, then roughened them so that they would adhere well to the shroud.
I JB welded the shroud into the properly sized "cone."
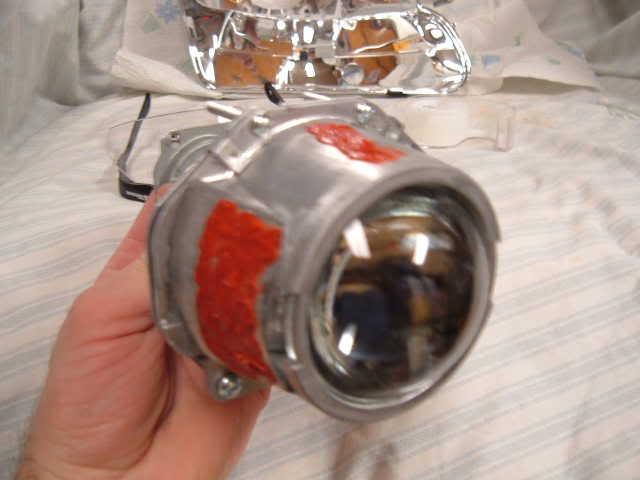
Then used high temp silicone to attach the shroud to the projector.
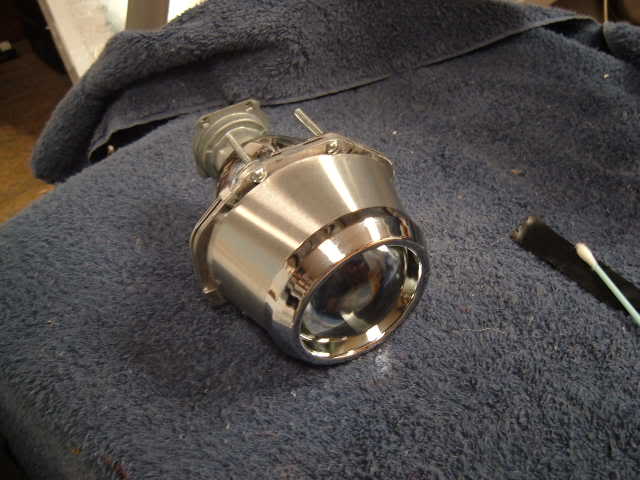
The chrome bezel is held on to the shroud using high temp silicone, trimmed excess from the seam and it's on there solid as a rock.
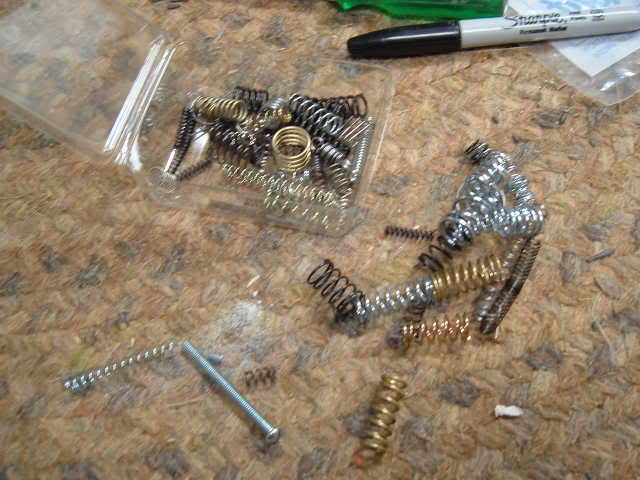
Now, bolt the projector to the reflector. I'd recommend that you put some little springs between the reflector and the bolt holes on the lens holder to keep tension so they don't shift or get loose.
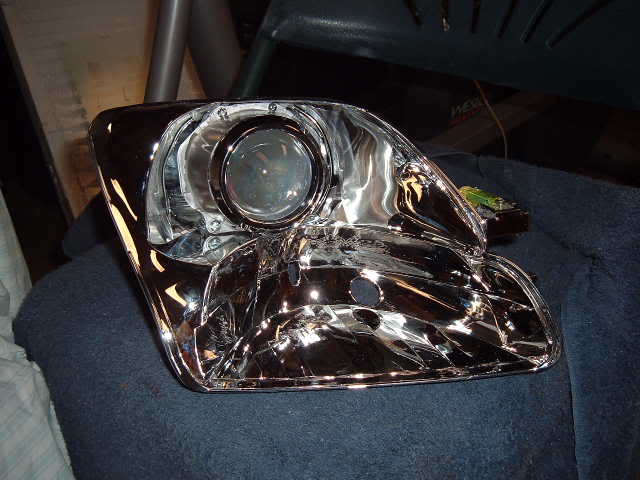
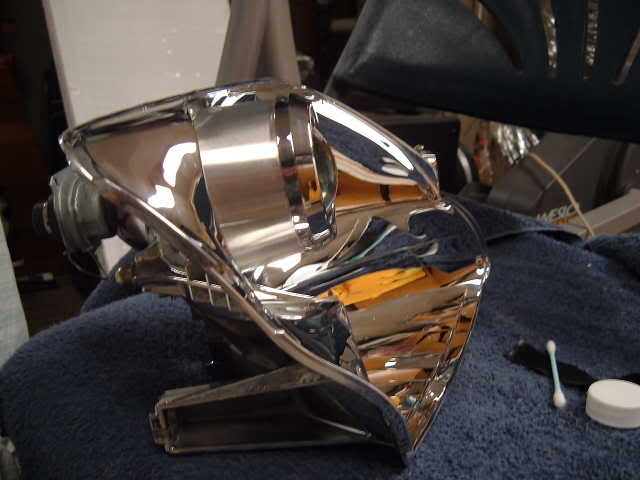
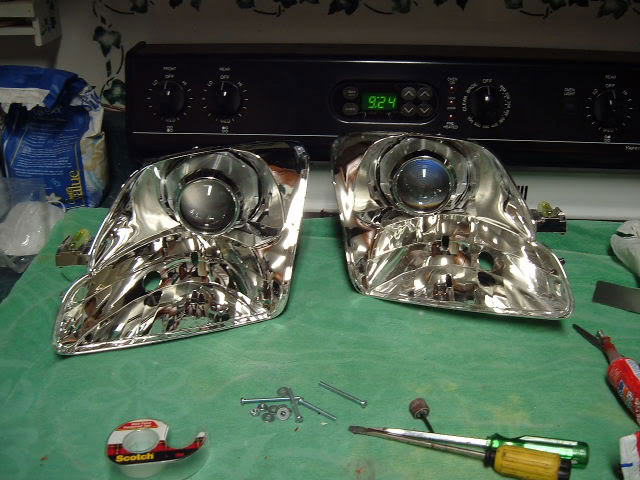
Set the flat bottom of the reflector on a flat surface and then look at the bottom of the projector and make sure the projector is rotationally aligned and then use the lines on the bottom of the high beam reflector to make sure it sits straight and no pointing off right or left. Then sit the reflector on a flat surface and make sure it is pointing out flat and not pointed up or down. (right/left and up/down can be adjusted on the car but rotational alignment cannot so it must be perfect at this phase. For the best alignment you should test the projectors on the car for proper aiming before permanently bolting them to the reflectors:
Final mounting! Clean your projector lenses, reflector bowl, etc. with a lint free cotton cloth and rubbing alcohol to remove all grease and residues:
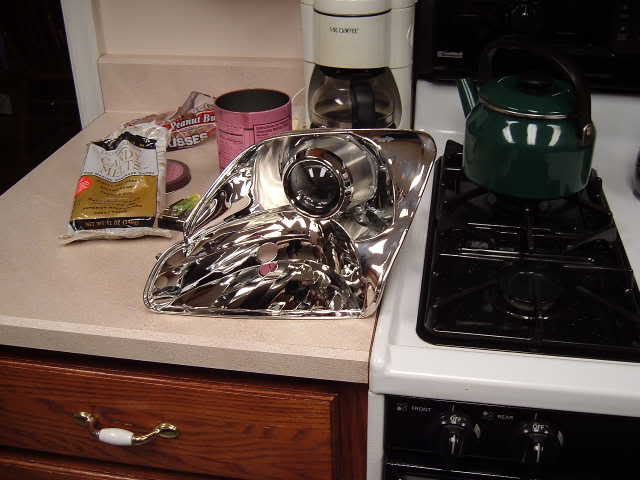
To put the lenses back on:
I just reheated my seals (same way you did to take them apart) and clamped it back together till it cooled. We are almost done!
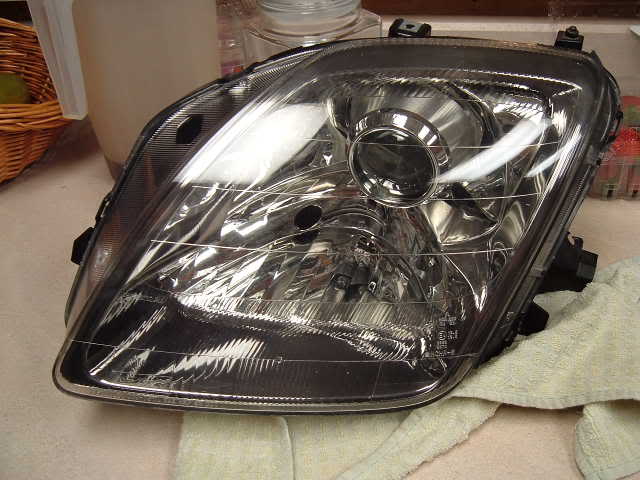
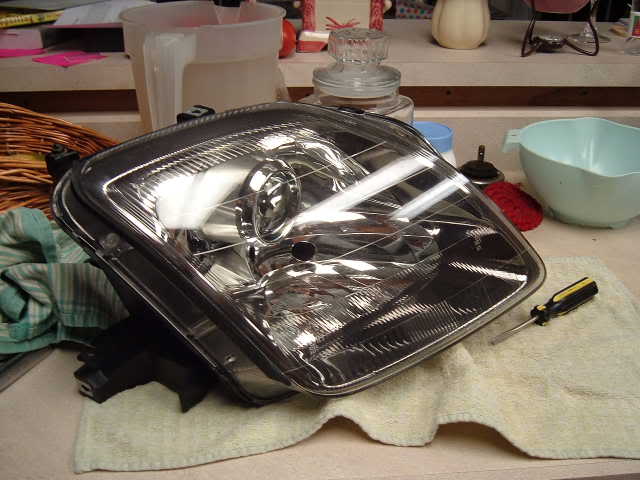
I'd recommend leaving the back of your headlights open a week to let the silicone gases escape) and then use the rubber seals, trimmed to fit over the D2S base as best as possible, if there are gaps seal them up with foam or cover with foil to keep bugs out.
The next pic shows the back of a retrofit properly trimmed around the bulb:
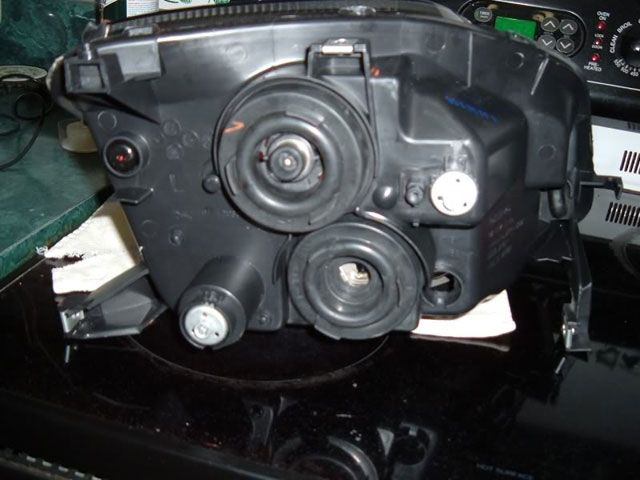
Now, put the lights back on the car, attach your wiring harnesses and ballasts, fire them up and adjust the aiming using the stock alignment wheels, put the bumper cover back on and reattach all your aux. lights and you are rolling with real headlights!
(Retrofit on the right, S2000 on the left)
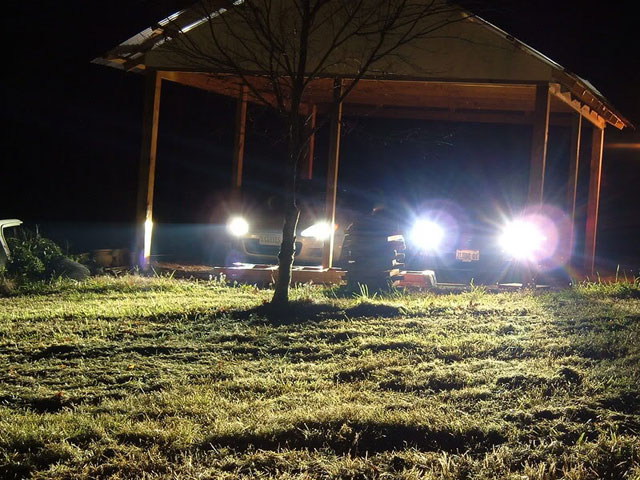
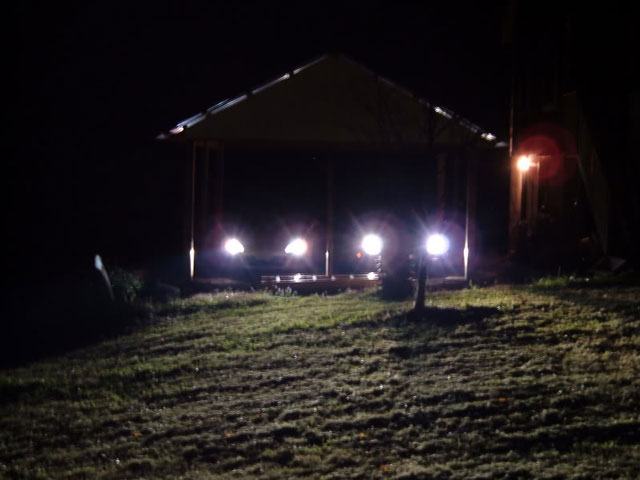
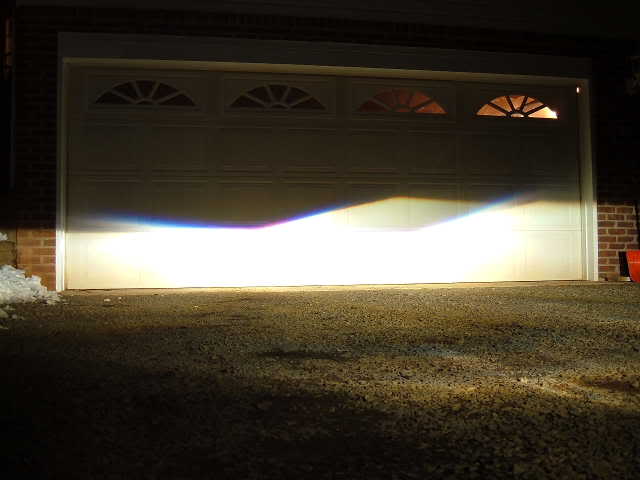
This isn't perfect but it's close to how your aiming should look on a wall at 25' from the car when done using ECE cutoff shields.
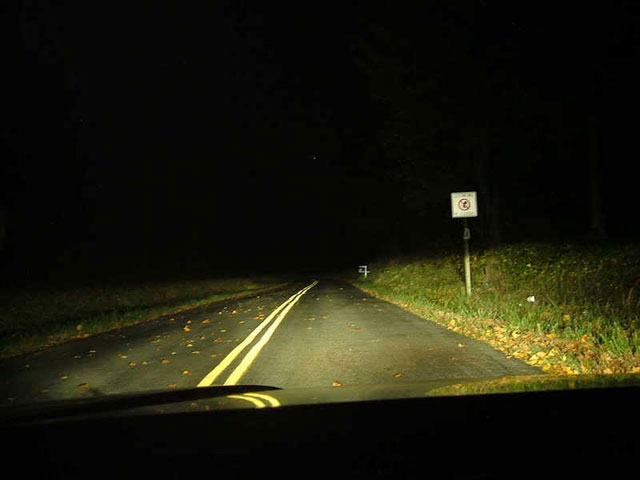
Output on a dark back road, retrofit only, no high beams!
--- This how to courtesy of JLUDE ---
|
Store

Engine

Exhaust

Exterior

Interior

Misc.

Suspension

Wheels
|


